


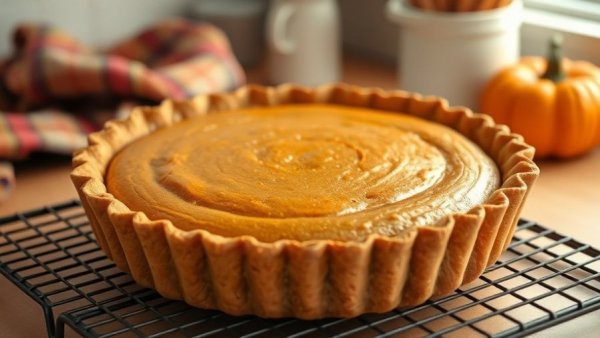
Why Does My Pumpkin Pie Crack?
Getting that perfect pumpkin pie looks easy, but a crack can send it into the realm of disappointment, especially when everyone is gathered around the table eager to enjoy a slice. The main culprits are typically overbeaten eggs, overbaking, or letting the pie cool too rapidly. Think of your pie as a delicate custard that relies on a balance between liquid and air—too much air can create a potential disaster at your Thanksgiving dinner. Keeping factors like your mixing technique and baking environment in check can make all the difference.
Insider Tips to Prevent Cracks
Being a home baker doesn’t mean you should settle for a subpar pie. Here are the tried-and-true methods to help you ace your pumpkin pie and impress your guests:
1. Mix Wisely: The Eggs Are Key
When mixing your pie filling, remember: less is more. Egg aeration can lead to cracks when the filling rises and deflates during baking. Use room-temperature eggs as they blend better and require less mixing. Combine them gently—just until mixed! This way, your custard retains its silky texture. Additionally, consider using farm-fresh eggs for added flavor; they can make a noticeable difference!
2. Know Your Oven's Secrets
Every oven has its quirks, and sometimes these quirks lead to unexpected results. By investing in an oven thermometer, you can ensure your pie bakes at the ideal temperature. If your oven is too hot, you could end up with an overbaked pie before you know it. Trust me, spending a few bucks on this thermometer will save you stress and ensure better bakes all season long. Remember, precision is key in baking!
3. Right Rack, Right Bake
Bake your pie on the lowest rack. It bakes more evenly that way—keeping your crust golden and your filling soft. The bottom rack provides the right conditions for low and slow cooking, a method perfect for custards! On that note, avoiding hot spots in your oven can also help you get a consistent bake. If you're making multiple pies, try rotating their positions halfway through cooking for equal temperature treatment.
4. Spot the Perfect Bake
Learn when your pumpkin pie is ready without opening the oven door too early. The edges should dome slightly while the center remains gently wobbly. Each pie continues to cook once out of the oven, so catching it at the right moment is key! Also, remember to check for signs like a slightly puffed edge and a smooth, shiny surface to truly gauge your pie's doneness.
5. Cooling Is Crucial
Cooling your pie properly is vital. Rapid temperature shifts can undo all your hard work. Allow it to cool slowly on the countertop before transferring it to the fridge. Once in the fridge, cover it loosely with foil to prevent condensation from creating sogginess. You want that masterpiece to shine at your holiday table! Additionally, patience during the cooling process is important—allow at least two hours of cooling time to set the filling fully.
What to Do If Your Pie Cracks
If your pie does crack despite your best efforts, don’t fret! You can turn this mishap into a delightful presentation. Try covering the cracks with whipped cream or a spiced pecan topping. Who says cracks have to ruin the fun? Think outside the box! For an even more festive touch, consider drizzling caramel or a sprinkle of nutmeg over the top to draw attention away from the imperfections. Remember, it’s all about the taste, and a little creativity goes a long way.
Conclusion: Bake Up Some Thanksgiving Magic!
If you’ve ever walked out of the kitchen feeling defeated by a cracked pie, remember these tips next time! With these simple methods in your baking arsenal, you can create a stunning pumpkin pie that looks great and tastes even better—no more cracks! Plus, the satisfaction of not only baking but perfecting your pie will make your Thanksgiving dinner that much more special. Ready to impress your loved ones this Thanksgiving? Grab those ingredients, and let's get baking!



Write A Comment